C# / .NET Coreを使ったマイクロサービス開発を支援するツール Project Tye がリリースされました。 ASP.NETの開発チームが公開した下記のブログ記事を実際に試してみた内容を記載します。
どういうツール?
Project Tyeは、マイクロサービスと分散アプリケーションの開発、テスト、デプロイを容易にするツールです。 ただし現在は実験的な(experimental)開発者ツールとして提供されているため、今後機能の追加、変更、廃止が行われる可能性はあります。そのため、この投稿は2020年8月1日時点の情報となっています。
ソースコードはこちらのGitHubリポジトリで公開されています。
Project Tye でできること
- マイクロサービスの開発を容易にする
- 1つのコマンドで多くのサービスを実行する
- コンテナでの依存関係の使用
- 単純な規則を使用して他のサービスのアドレスを発見する
- .NETアプリケーションのKubernetesへのデプロイメントの自動化
- .NETアプリケーションの自動コンテナ化
- 最小限の知識または構成でKubernetesマニフェストを生成する
- 単一の構成ファイルを使用する
Project Tyeを使うことで専用のダッシュボードが利用可能となり、マイクロサービス構成の各アプリケーションを閲覧することもできます。

インストール方法
前提としてProject Tyeには .NET Core 3.1 が必要なので、予めインストールしておきましょう。
Project Tyeは .NET Coreのグローバルツールとして利用することができます。下記のコマンドでインストールします。
$ dotnet tool update -g Microsoft.Tye --version "0.4.0-alpha.20371.1"
正しくインストールできたことを確認するには、下記のコマンドを実行します。
$ dotnet tool list -g
パッケージ ID                              バージョン                    コマンド
-------------------------------------------------------------------------
microsoft.tye                         0.4.0-alpha.20371.1      tye
サンプルアプリケーションを作ってみる
フロントエンド
まずフロントエンドのアプリケーションとして、ASP.NET Core Razor Pagesのプロジェクトを作成します。
$ mkdir microservices
$ cd microservices
$ dotnet new razor -n frontend

The template "ASP.NET Core Web App" was created successfully.
This template contains technologies from parties other than Microsoft, see https://aka.ms/aspnetcore/3.1-third-party-notices for details.

Processing post-creation actions...
Running 'dotnet restore' on frontend\frontend.csproj...
  復元対象のプロジェクトを決定しています...
  D:\src\yuta\netcore\microservices\frontend\frontend.csproj を復元しました (221 ms)。

Restore succeeded.
作ったばかりのプロジェクトに対してTyeを実行してみます。
$ tye run frontend
Loading Application Details...
Launching Tye Host...

[17:16:18 INF] Executing application from D:\src\yuta\netcore\microservices\frontend\frontend.csproj
[17:16:18 INF] Dashboard running on http://127.0.0.1:8000
[17:16:18 INF] Building projects
[17:16:24 INF] Launching service frontend_03aff344-7: D:\src\yuta\netcore\microservices\frontend\bin\Debug\netcoreapp3.1\frontend.exe
[17:16:24 INF] frontend_03aff344-7 running on process id 25512 bound to http://localhost:59457, https://localhost:59458
[17:16:24 INF] No process was selected. Waiting.
[17:16:25 INF] Selected process 25512.
[17:16:25 INF] Listening for event pipe events for frontend_03aff344-7 on process id 25512
tye runコマンドでは、指定したアプリケーションの実行が行われます。
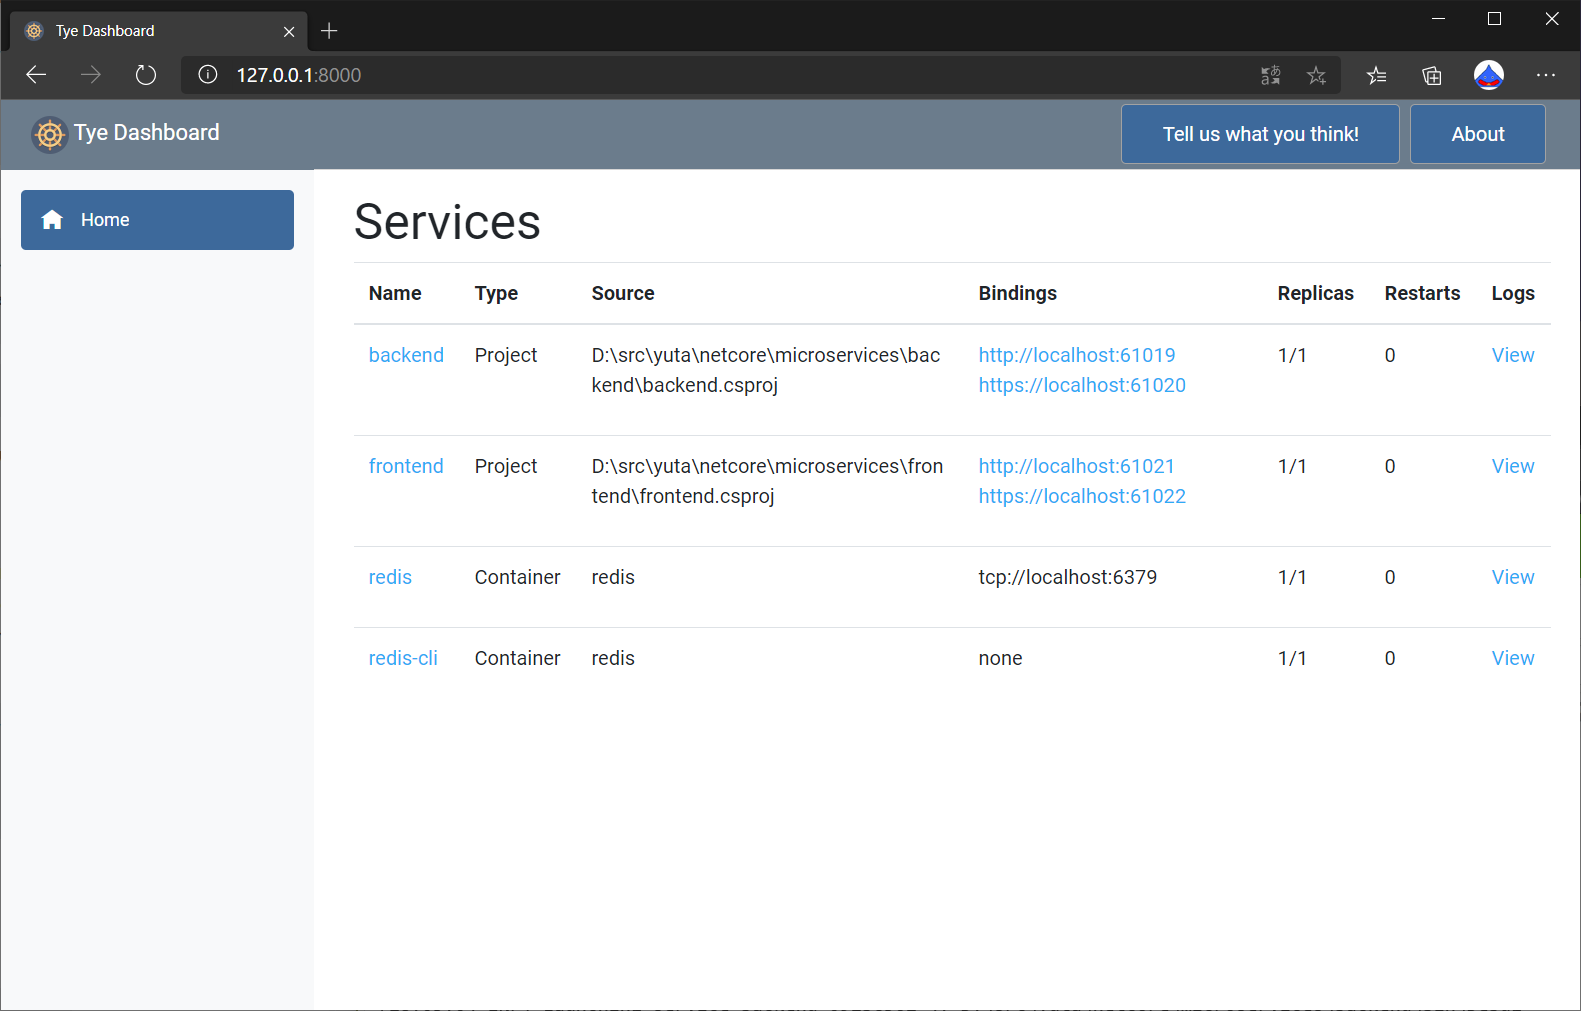
その際、Tyeのダッシュボードも同時に実行されるため、http://127.0.0.1:8000にアクセスするとフロントエンドのアプリケーションがサービスとして登録されていることがわかります。

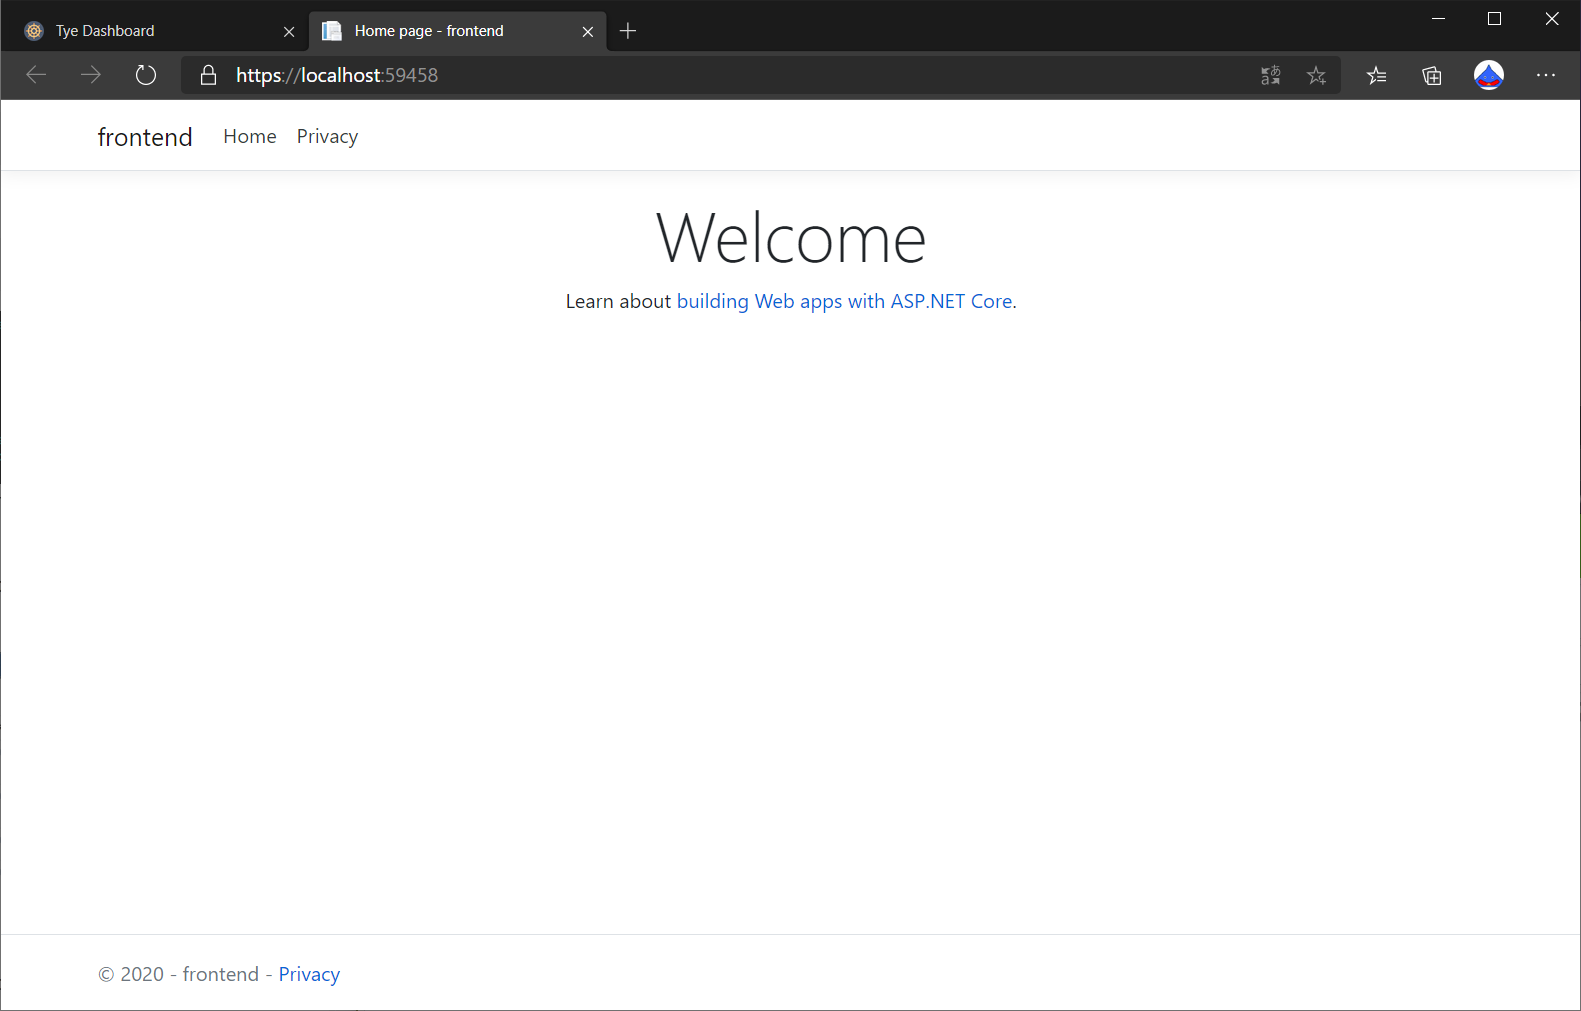
表のBindings列に表示されているのがフロントエンドアプリケーションにアクセスするためのURLです。アクセスすると実際にページを閲覧することができます。
また、表のLogs>Viewにアクセスすることでアプリケーションのログを閲覧することもできます。ここで表示されるログは標準出力に流れるログです。

バックエンドサービスを追加する
次にバックエンドサービスとしてASP.NET Core WebAPIのアプリケーションとソリューションファイルを作成します。
$ dotnet new webapi -n backend
$ dotnet new sln
$ dotnet sln add frontend backend
作成したソリューションファイルに対してTyeを実行してみます。 ソリューションファイルに含まれるフロントエンドとバックエンドのアプリケーションが起動します。
$ tye run
Loading Application Details...
Launching Tye Host...

[17:29:00 INF] Executing application from D:\src\yuta\netcore\microservices\microservices.sln
[17:29:00 INF] Dashboard running on http://127.0.0.1:8000
[17:29:00 INF] Building projects
[17:29:06 INF] Launching service backend_cf382a78-c: D:\src\yuta\netcore\microservices\backend\bin\Debug\netcoreapp3.1\backend.exe
[17:29:06 INF] Launching service frontend_be0c1aa4-d: D:\src\yuta\netcore\microservices\frontend\bin\Debug\netcoreapp3.1\frontend.exe
[17:29:06 INF] backend_cf382a78-c running on process id 28564 bound to http://localhost:59884, https://localhost:59885
[17:29:06 INF] No process was selected. Waiting.
[17:29:06 INF] frontend_be0c1aa4-d running on process id 2740 bound to http://localhost:59882, https://localhost:59883
[17:29:06 INF] No process was selected. Waiting.
[17:29:06 INF] Selected process 28564.
[17:29:06 INF] Listening for event pipe events for backend_cf382a78-c on process id 28564
[17:29:06 INF] Selected process 2740.
[17:29:06 INF] Listening for event pipe events for frontend_be0c1aa4-d on process id 2740
ダッシュボードにも2つのサービスが登録されていることが確認できます。

フロントエンドからバックエンドサービスを呼び出す
フロントエンドからバックエンドのWebAPIを呼び出し、APIが返すデータを画面に表示するようにします。 実際のC#コードは省略するため本家の記事を参照してください。
Tyeを通じてフロントエンドからバックエンドサービスを呼び出す上で、通常のASP.NET Coreの実装と異なる部分があリます。
まず、下記のコマンドでフロントエンドアプリケーションに拡張機能をインストールします。
$ dotnet add frontend/frontend.csproj package Microsoft.Tye.Extensions.Configuration --version "0.4.0-*"
次に、フロントエンドアプリケーションのStartup.csファイルのConfigureServicesメソッドにて、バックエンドサービスに通信するためのHTTPクライアントを登録します。
public void ConfigureServices(IServiceCollection services)
{
   services.AddRazorPages();

   // ここから
   services.AddHttpClient<WeatherClient>(client =>
   {
      client.BaseAddress = Configuration.GetServiceUri("backend");
   });
   // ここまで
}
GetServiceUriメソッドが拡張機能によって利用可能となり、指定した名前のサービスのURIを取得することができます。
https://github.com/dotnet/tye/blob/083a97f353069ef8a091651d4c9ca445c994b2e5/src/Microsoft.Tye.Extensions.Configuration/TyeConfigurationExtensions.cs#L11
一通りの実装を終えたら再びTyeを実行し、フロントエンドアプリケーションにアクセスするとバックエンドAPIが返すデータを表示することを確認できます。

Tyeの構成管理ファイルを作成する
tye.yamlというYAMLファイルで構成を管理することができ、依存関係のカスタマイズも行うことができます。
まずは既存のソリューションファイルからtye.yamlを作成します。
$ tye init
Created 'D:\src\yuta\netcore\microservices\tye.yaml'.
tye.yamlをみると、フロントエンドとバックエンドがサービスとして登録されていることが確認できます。
# tye application configuration file
# read all about it at https://github.com/dotnet/tye
#
# when you've given us a try, we'd love to know what you think:
#    https://aka.ms/AA7q20u
#
name: microservices
services:
- name: frontend
  project: frontend/frontend.csproj
- name: backend
  project: backend/backend.csproj
tye.yamlのスキーマ構成についてはこちらに説明が載っています。
https://github.com/dotnet/tye/blob/master/docs/reference/schema.md
キャッシュ用のRedisを追加する
バックエンドAPIにRedisによるキャッシュを追加します。こちらも具体的なC#のコードについては本家の記事を参照してください。
ここで大事なのはバックエンドアプリケーションにおいて、Redisの接続文字列の扱い方です。
バックエンドアプリケーションのStartup.csファイルのConfigureServicesメソッドでは、このようにRedisの設定を行っています。
public void ConfigureServices(IServiceCollection services)
{
   services.AddControllers();

   // ここから
   services.AddStackExchangeRedisCache(o =>
   {
      o.Configuration = Configuration.GetConnectionString("redis");
   });
   // ここまで
}
"redis"という名前の接続情報を環境変数から取得して使用しています。(Configuration.GetConnectionStringメソッド)
ただしまだ"redis"という名前の環境変数はありませんので、tye.yamlを編集してRedisを構成します。
name: microservice
services:
- name: backend
  project: backend\backend.csproj
- name: frontend
  project: frontend\frontend.csproj
- name: redis
  image: redis
  bindings:
  - port: 6379
    connectionString: "${host}:${port}"
- name: redis-cli
  image: redis
  args: "redis-cli -h redis MONITOR"
RedisおよびRedis CLIをサービスとして追加しました。(3番目と4番目)
開発環境にインストールされたものを利用するのではなく、image部分にてDockerコンテナーとしてRedisとRedis CLIを用意する内容になっています。
またconnectionString: "${host}:${port}"にてRedisの接続情報を定義しています。
フロントエンド+バックエンド+Redis のアプリケーションを実行する
Tyeを実行するとtye.yamlに定義された構成に沿ってアプリケーションを実行します。
そのためDockerを予め起動しておく必要があります。
$ tye run
Loading Application Details...
Launching Tye Host...

[18:04:59 INF] Executing application from D:\src\yuta\netcore\microservices\tye.yaml
[18:05:00 INF] Dashboard running on http://127.0.0.1:8000
[18:05:01 INF] Docker image redis already installed
[18:05:01 INF] Creating docker network tye_network_527351f0-d
[18:05:01 INF] Running docker command network create --driver bridge tye_network_527351f0-d
[18:05:01 INF] Running image redis for redis_9c95ee87-2
[18:05:01 INF] Running image redis for redis-cli_deeaaa37-a
[18:05:01 INF] Running image mcr.microsoft.com/dotnet/core/sdk:3.1 for backend-proxy_88944fc9-7
[18:05:01 INF] Running image mcr.microsoft.com/dotnet/core/sdk:3.1 for frontend-proxy_314a0623-6
[18:05:01 INF] Building projects
[18:05:02 INF] Running container redis_9c95ee87-2 with ID 554f506efc4c
[18:05:02 INF] Running docker command network connect tye_network_527351f0-d redis_9c95ee87-2 --alias redis
[18:05:02 INF] Running container redis-cli_deeaaa37-a with ID 0911e9cca09a
[18:05:02 INF] Running docker command network connect tye_network_527351f0-d redis-cli_deeaaa37-a --alias redis-cli
[18:05:03 INF] Collecting docker logs for redis_9c95ee87-2.
[18:05:03 INF] Collecting docker logs for redis-cli_deeaaa37-a.
[18:05:04 INF] Launching service frontend_4fb62798-4: D:\src\yuta\netcore\microservices\frontend\bin\Debug\netcoreapp3.1\frontend.exe
[18:05:04 INF] Launching service backend_092bc562-4: D:\src\yuta\netcore\microservices\backend\bin\Debug\netcoreapp3.1\backend.exe
[18:05:04 INF] frontend_4fb62798-4 running on process id 27144 bound to http://localhost:61021, https://localhost:61022
[18:05:04 INF] No process was selected. Waiting.
[18:05:04 INF] backend_092bc562-4 running on process id 14672 bound to http://localhost:61019, https://localhost:61020
[18:05:04 INF] No process was selected. Waiting.
[18:05:05 INF] Selected process 27144.
[18:05:05 INF] Listening for event pipe events for frontend_4fb62798-4 on process id 27144
[18:05:05 INF] Selected process 14672.
[18:05:05 INF] Listening for event pipe events for backend_092bc562-4 on process id 14672
[18:05:06 INF] Running container frontend-proxy_314a0623-6 with ID 19322eff7c3f
[18:05:06 INF] Running docker command network connect tye_network_527351f0-d frontend-proxy_314a0623-6 --alias frontend
[18:05:06 INF] Running container backend-proxy_88944fc9-7 with ID 36240965761c
[18:05:06 INF] Running docker command network connect tye_network_527351f0-d backend-proxy_88944fc9-7 --alias backend
[18:05:06 INF] Collecting docker logs for frontend-proxy_314a0623-6.
[18:05:07 INF] Collecting docker logs for backend-proxy_88944fc9-7.
Tyeのダッシュボードを確認するとフロントエンド、バックエンドのサービスに加え、RedisとRedis CLIも登録されていることがわかります。

まとめ
本家の記事に沿って、簡単なマイクロサービスアプリケーションを実装してみました。 Project Tyeはまだ実験中のツールですが、ダッシュボードが使え、YAMLファイルでアプリケーションの依存関係を管理することができるため便利そうですね。
次回はこのアプリケーションをKubernetesにデプロイしてみようと思います。