Azure CLI を開発環境で使用する場合、Windows や WSL2 の Ubuntu にインストールして使っていましたが、devcontainer にしちゃうのが便利だなと感じてきました。
learn.microsoft.com
Azure CLI devcontainer の作成
プロファイル用のディレクトリの作成
devcontainer 用のディレクトリを作成し、Visual Studio Code で開きます。
$ mkdir az-profile-development
$ code az-profile-development
devcontainer 定義の作成
Command Palette > Dev Containers: Add Dev Container Configuration Files... > Azure CLI を選びます。
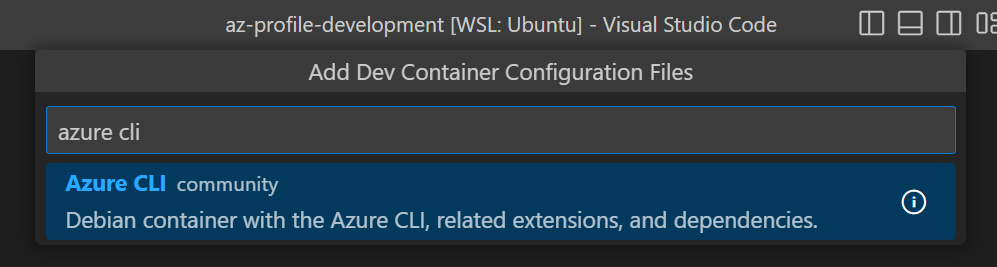
.devcontainer/devcontainer.json はこうなります。
{
    "name": "Azure CLI",
    "dockerFile": "Dockerfile",

    // Configure tool-specific properties.
    "customizations": {
        // Configure properties specific to VS Code.
        "vscode": {
            // Add the IDs of extensions you want installed when the container is created.
            "extensions": [
                "ms-vscode.azurecli"
            ]
        }
    },

    // Use 'forwardPorts' to make a list of ports inside the container available locally.
    // "forwardPorts": [],

    // Use 'postCreateCommand' to run commands after the container is created.
    // "postCreateCommand": "az --version",

    // Uncomment when using a ptrace-based debugger like C++, Go, and Rust
    // "runArgs": [ "--cap-add=SYS_PTRACE", "--security-opt", "seccomp=unconfined" ],

    // Set `remoteUser` to `root` to connect as root instead. More info: https://aka.ms/vscode-remote/containers/non-root.
    "remoteUser": "vscode"
}
コンテナーの起動
devcontainer 定義を作成すると Reopen in Container がポップアップされるため、クリックします。
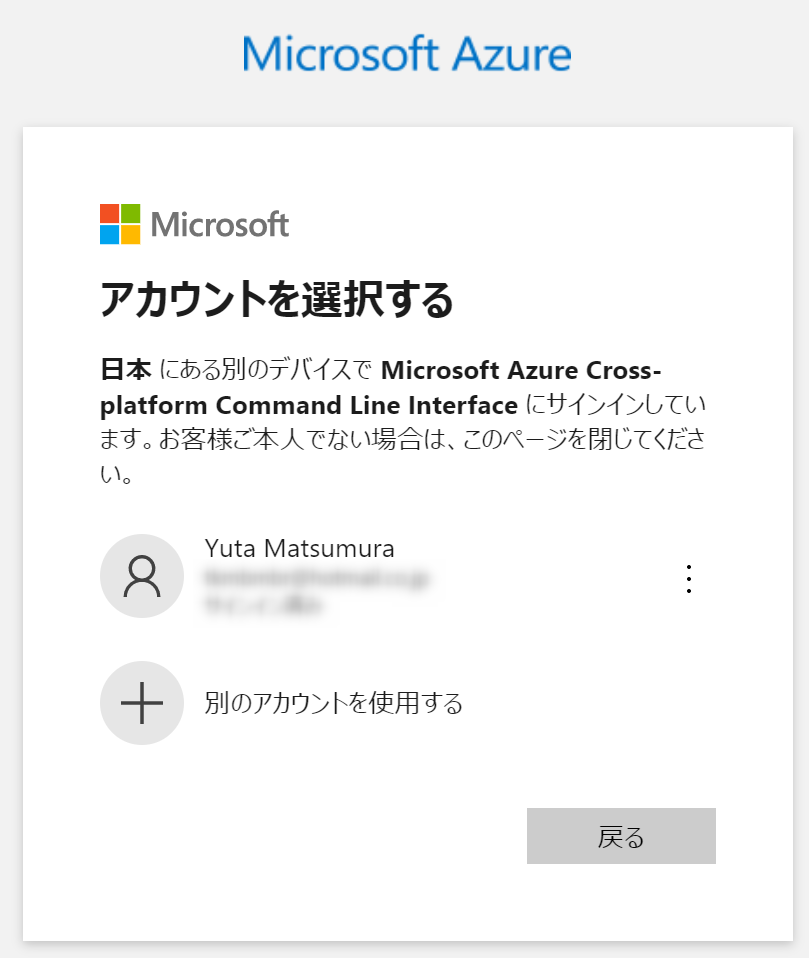
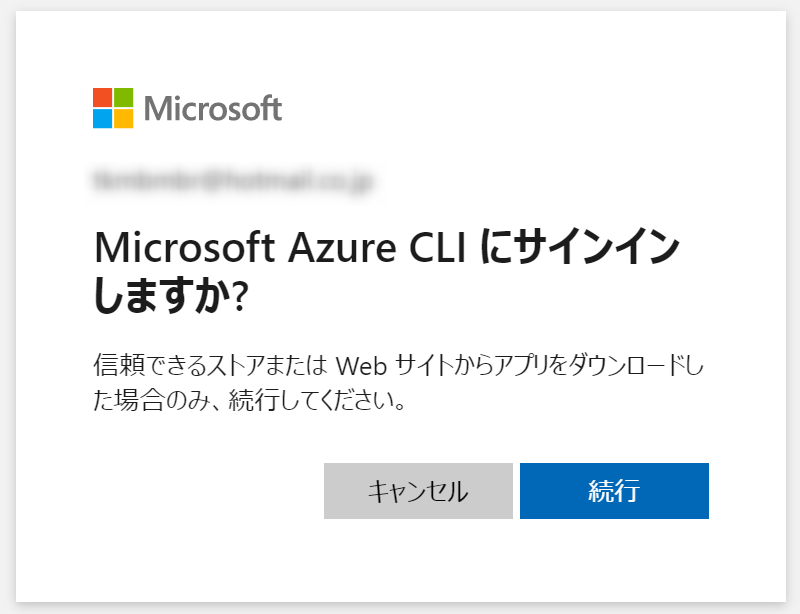
az login の実行
コンテナーを起動したばかりの時は、Azure CLI はどのアカウントにもログインしていません。
VSCode のターミナルでコンテナー内のシェルを起動して、コマンドで確認します。
$ az account list -o table
Please run "az login" to access your accounts.
az login でアカウントへのログインを行います。
Azure CLI 環境の準備完了
Azure にログインしたあとは目的のサブスクリプションに接続し、CLI を実行していきます。

この方法であれば、ローカル環境に Azure CLI をインストールする必要がなくなります。
また、プロファイルごとにディレクトリと devcontainer 定義を作成すれば、アカウントの使い分けを行うこともできるのが便利です。
(追記)
Dockerイメージがプロファイルごとに増えるのはちょっと気になるけど、まぁ自分の場合は同時3つくらいなので許容範囲ということで。
※自分の環境では【1.99GB】のコンテナーイメージになりました


